한국어

The guide · Audio

Give it sound and MIDI.

The Audio edition is the same Patternflow with more ways in and out: sound from a browser tab, a microphone on the board, and MIDI between the board and your DAW. Put the edition on once, then take whichever you came for.

All guides

Scroll

The Audio edition

Once. The same board, with firmware that takes sound in and speaks MIDI.

An edition

The same board, more firmware.

An edition is Patternflow's firmware with features added. Audio adds sound from a browser tab, a microphone on the board, MIDI and OSC. The microphone is optional: it stays off until you fit one and switch it on.

Your patterns, Wi-Fi networks and settings stay: an update rewrites the program only. Going back to the default firmware is the same click.

Stuck here? Tell us

Install

Install to my panel.

At patternflow.work/editions (the button below opens it), find Patternflow Audio and press Install to my panel. Your browser opens the board's own Update page with the build already linked.

Press Fetch & flash there. Keep the board powered: it restarts by itself on the new build.

The board has to be running, on the same Wi-Fi as this computer. A new ESP32 gets that far in the Play guide's 01 Flash, over USB.

Android can't open patternflow.local. Hold K2, read the IP address, and type it under Details → your panel on the card first.

Stuck here? Tell us

Check

Hold K2. Two new rows.

The NETWORK screen now has two rows under its title, above the Wi-Fi line and the address: OSC and AUD.

AUD is the switch for sound from the browser extension. Turn K3 right for on, left for off; K2 does the same for OSC. Both start on.

In the console, the header has two new pages, Audio and MIDI. MIDI has no row on this screen: its switch is on the MIDI page.

Stuck here? Tell us

A browser tab

Whatever a tab is playing turns the four knobs.

Needs the Audio edition on the board

The extension

Load it from the repository.

The extension isn't on the Chrome Web Store. On github.com/engmung/Patternflow, press Code → Download ZIP and unzip it.

In Chrome open chrome://extensions, in Edge edge://extensions. Switch on Developer mode, press Load unpacked and pick the folder tools/patternflow-audio-extension.

Got a newer copy later? Put it in the same folder, then press Reload on the extension's card on that page. Your mapping is kept.

Stuck here? Tell us

Start

Open the tab, press Start.

Go to the tab that's playing and click the Patternflow Audio button in the toolbar there. Under Device, type your board's address (patternflow.local, or the IP address from hold K2) and press Start.

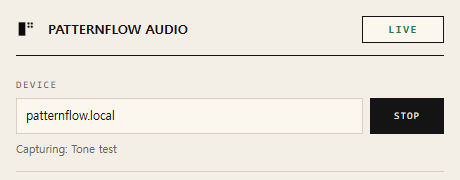
The corner of the popup says Live and the pattern starts moving. The knobs themselves stay still: sound moves their values, not the knobs. Stop, on the same button, gives the knobs back.

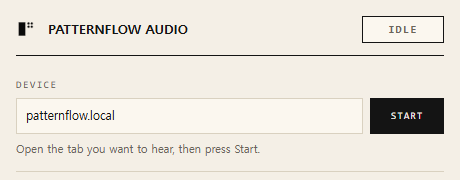
The top of the extension's popup: the corner badge reads Idle, and patternflow.local is in the Device field beside a Start button.
Idle

Before Start. The address goes under Device.

Stuck here? Tell us

Not Live?

The popup tells you why.

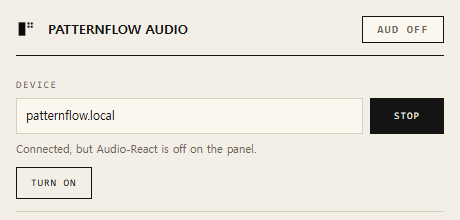
Aud off: the board is connected but ignoring what arrives. Press Turn on. It's the same switch as the AUD row on hold K2.

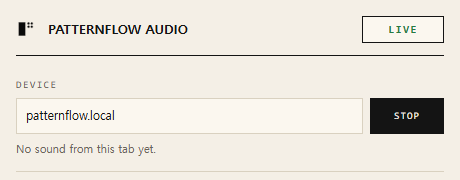
Live, but nothing moves: two seconds without sound, and the line under the address reads No sound from this tab yet. Check that it's the tab that's playing.

Error: the line under the address says what's wrong. Nothing at that address, or a board without the Audio edition.

The top of the extension's popup: the corner badge reads Aud off, the line under the address says Audio-React is off, and a Turn on button sits under it.
Aud off

The board is ignoring the sound. Turn on brings it back.

Stuck here? Tell us

The editor

Each knob is a box on the spectrum.

Press Mapping editor in the popup. K1 to K4 are four boxes on the live spectrum: a box's width is the frequencies that knob listens to, its height the quiet-to-loud window. The mapping is saved in your browser, not on the board.

Below is the real editor, driving the board on this page. Open it and drag K1's box sideways: K1 now follows another part of the spectrum. Mute, at the foot of K1's card, gives that knob back while it's on.

Now take a knob on the board here, by the orange dot on its ring. It's yours while you hold it, and for about five seconds after you let go. Your board does the same.

The editor on its own demo source. Opened from the extension, it shows what your tab is playing.
Stuck here? Tell us

The microphone

A small part and five leads, and the board hears the room with nothing else running.

Needs the Audio edition on the board

The part

A PDM microphone, and only PDM.

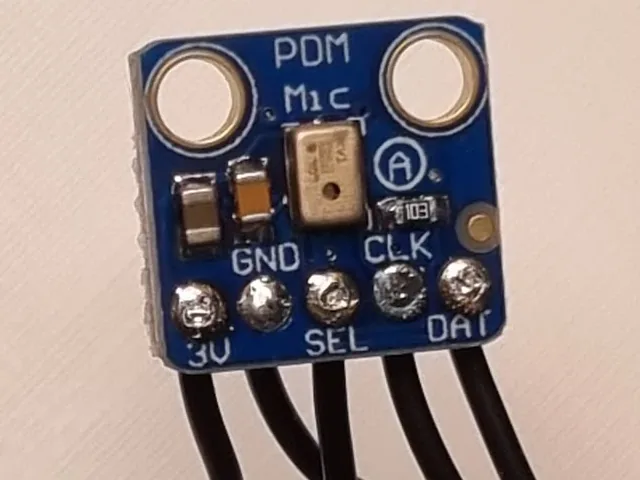
Adafruit's PDM MEMS Microphone Breakout (product 3492), or a clone whose pin row reads 3V, GND, SEL, CLK, DAT. Plus five thin leads of about 10 cm; shorter is better.

Not an INMP441 or any other I²S microphone, and not an analog electret module. The board has two free pins, and only PDM fits in two.

A small blue breakout board marked PDM Mic, with five soldered pads labelled 3V, GND, SEL, CLK and DAT and a black lead on each.

The breakout's silkscreen: PDM Mic, and a pad each for 3V, GND, SEL, CLK and DAT.

Stuck here? Tell us

The ESP32

Lift it out.

Slide the back cover off and lift the ESP32 straight up out of its sockets. Every joint goes on the ESP32 itself; the circuit board it sits in is never touched.

It's fully reversible: to undo it, take the leads off.

Stuck here? Tell us

Five leads, four places

Solder on the top side.

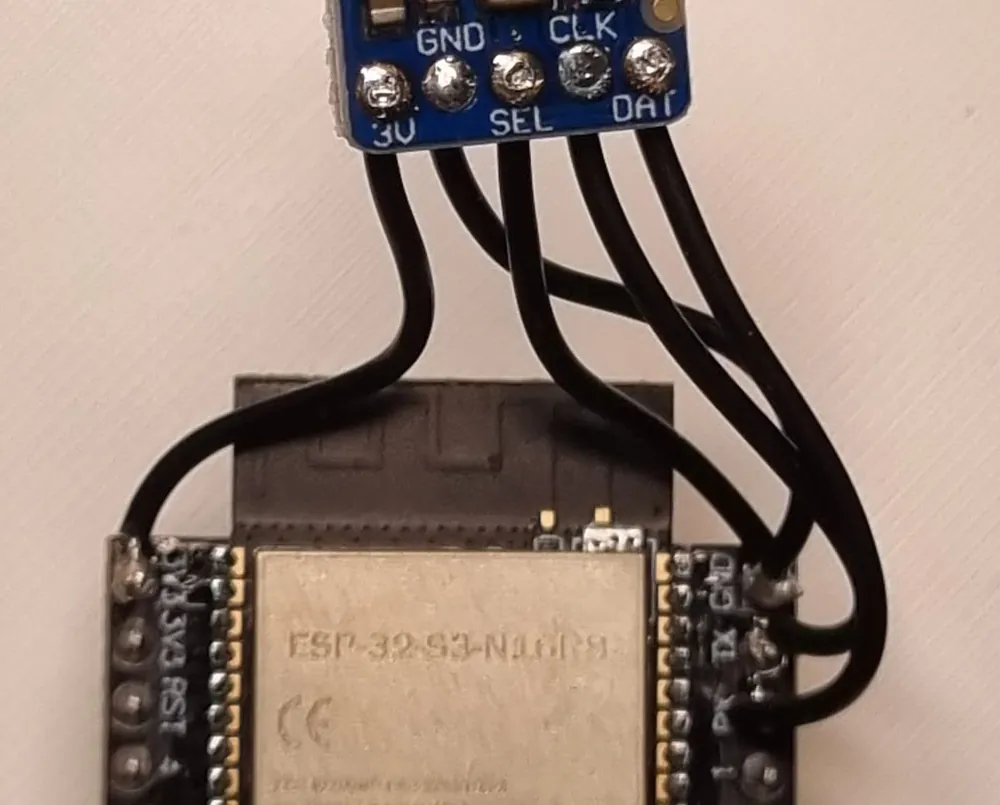
Solder where the header pins come through the top of the ESP32. 3V goes to 3V3. GND and SEL both go to GND. CLK goes to TX. DAT goes to RX.

The silkscreen says TX and RX: they're the only two free pins on the board. 3V3 and GND appear more than once on the headers; use whichever is closest.

Don't skip SEL to GND. Without it the microphone reads silence and looks perfectly healthy.

Five black leads run from the microphone breakout's pads down to the ESP32 module's header pins: one to 3V3 at the top of the left pin row, two to GND, and one each to TX and RX at the top of the right row.
Each lead, from the microphone's pad to the pin on the ESP32
Microphone3VGNDSELCLKDAT
ESP323V3GNDTXRX

In the photo, 3V3 is the top pin on the left. GND, TX and RX are the top three on the right; GND holds two leads.

Stuck here? Tell us

Back in

Seat it. Leave the right port empty.

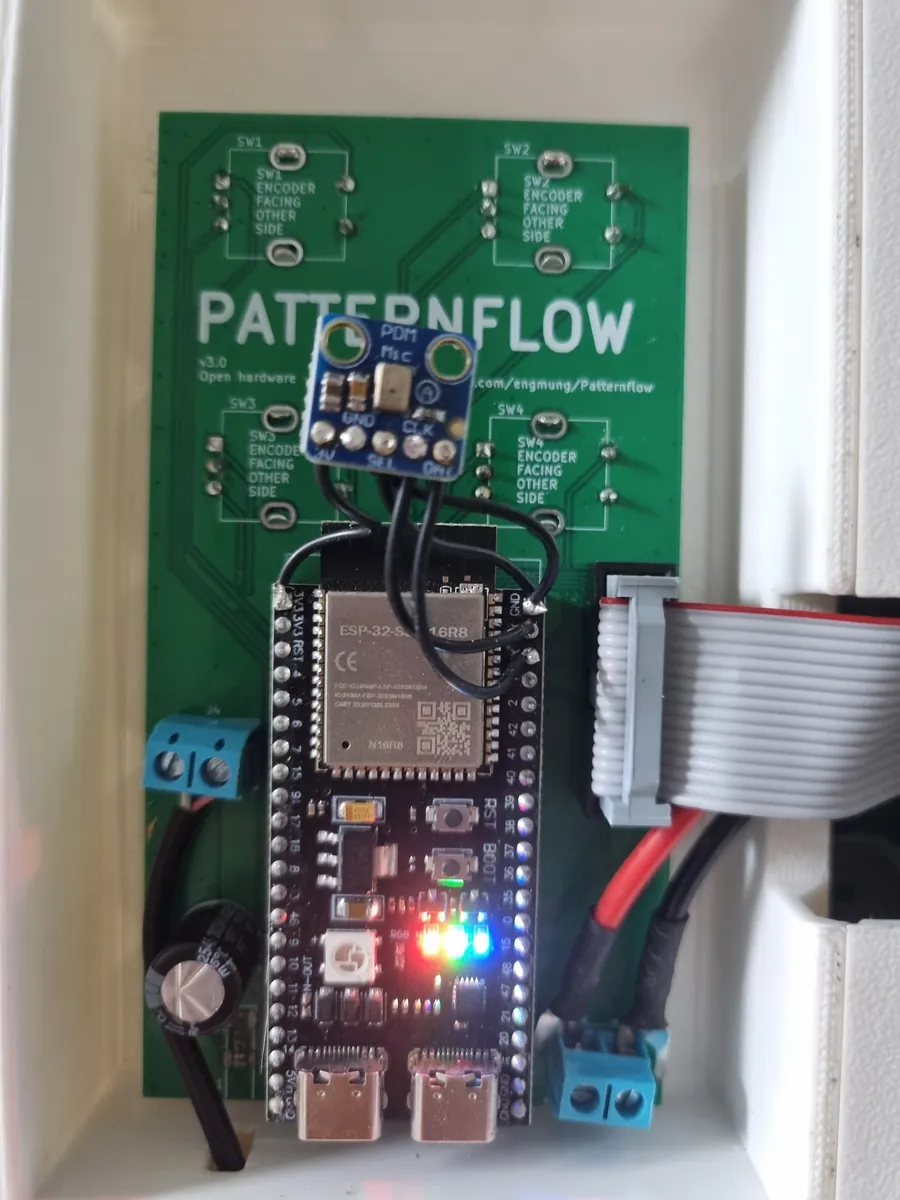
Route the leads out the top and seat the ESP32 the way the silkscreen shows. Put the microphone wherever sound reaches it, and power the board from its power cable, as always.

While the microphone is wired, plug nothing into the right USB port, the one labelled UART. It shares TX and RX.

The back of a Patternflow board in its case: the ESP32 module seated in its sockets, the microphone breakout above it on five short leads, and the module's two USB-C ports at the bottom, both empty.

The ESP32 back in its sockets, the microphone above it on its leads. The two USB-C ports at the bottom are the ESP32's own; UART is the right one.

Stuck here? Tell us

Switch it on

Console, Audio, Microphone.

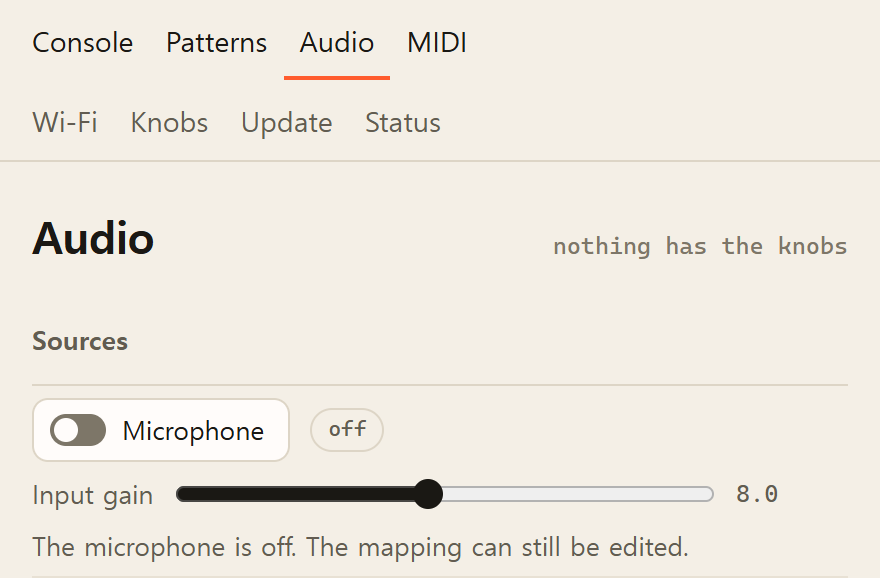
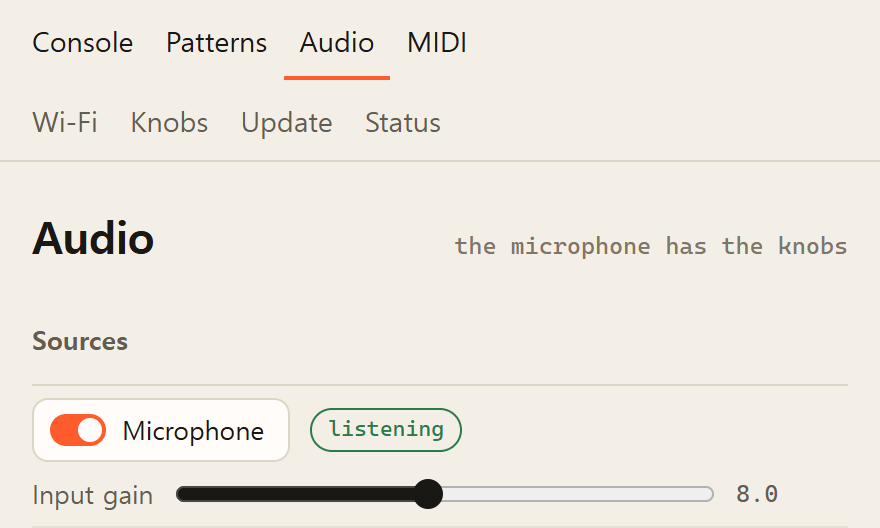
Open the console (patternflow.local in a browser on the same Wi-Fi, or the IP address from hold K2) and go to Audio. Under Sources, switch Microphone on.

The chip beside the switch turns to listening. Room quiet? Raise Input gain. It starts at 8.

The console's Audio page: under Sources the Microphone switch is off, the chip beside it reads off, and Input gain is at 8.0.
Microphone

Under Sources. Off, the chip beside it reads off.

Stuck here? Tell us

The mapping

Four boxes, saved on the board.

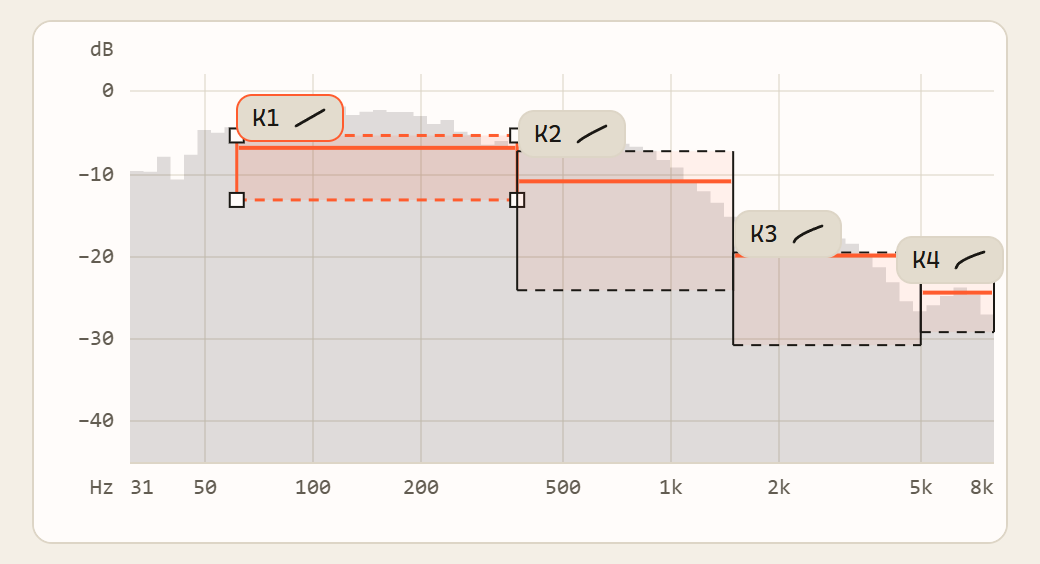
On the console's Audio page, under Mapping, each knob from K1 to K4 is a box on the live spectrum. A box's width is the frequencies that knob listens to; its height is the quiet-to-loud window. Drag K1's box over the bass and K1 follows the bass.

Changes save to the board as you make them, and survive restarts and firmware updates.

The Mapping plot on the console's Audio page: a spectrum from 31 Hz to 8 kHz, level in dB, with four boxes on it, K1 to K4 from left to right.

MappingK1 to K4, boxed on the spectrum the microphone hears.

Stuck here? Tell us

Quiet?

What the chip says.

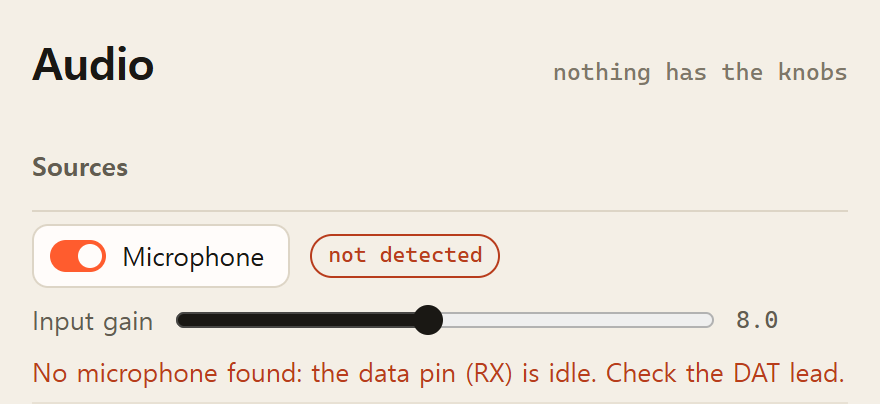
not detected, on the chip beside the Microphone switch: nothing on the data pin. Check the DAT lead to RX.

not answering: the microphone was there and has stopped sending. The knobs are left alone.

listening, but the knobs stay still however loud it gets: SEL isn't on GND. The board can't tell that from a quiet room.

Only the highest box barely moves, at normal volume: not a fault. At room volume the highest octaves carry almost no energy.

The console's Audio page: the Microphone switch is on, the chip beside it reads not detected, and the line under the Input gain slider reads No microphone found: the data pin (RX) is idle. Check the DAT lead.

not detectedUnder the slider, the page's own reason: the data pin (RX) is idle, check the DAT lead.

Stuck here? Tell us

MIDI & your DAW

The board is a MIDI device on your Wi-Fi. Its four knobs and four buttons play your DAW, and your DAW can play the board.

Needs the Audio edition on the board

Connect

Make a network MIDI session.

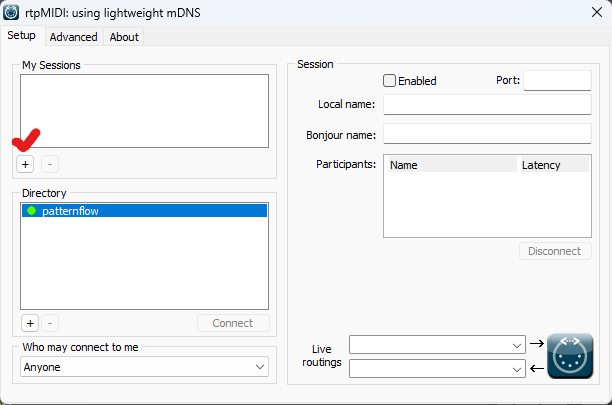
The computer has to be on the same Wi-Fi as the board. Windows has no network MIDI of its own, so install rtpMIDI (free, by Tobias Erichsen) and open it.

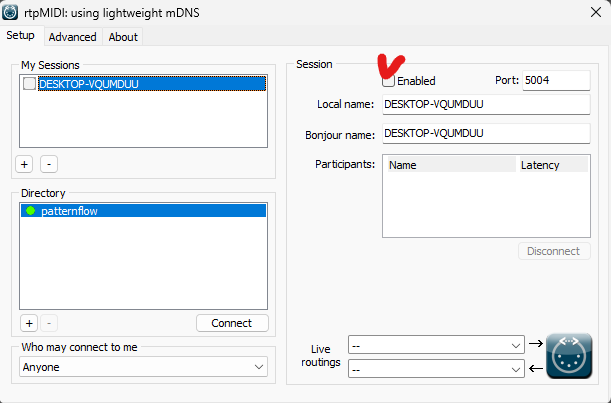
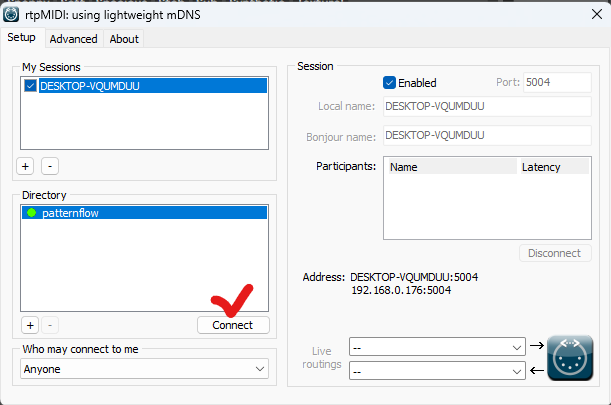
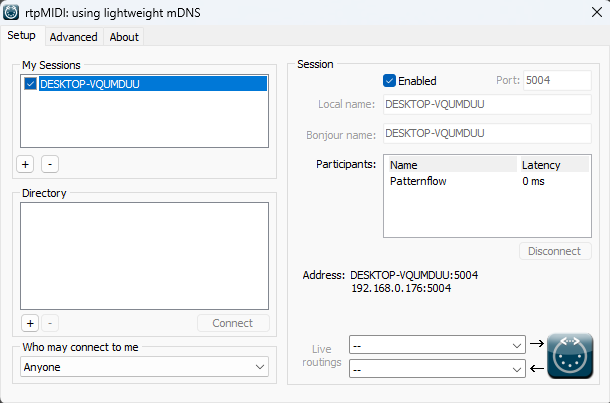
Press + under My Sessions and tick Enabled. Select patternflow in Directory and press Connect: it moves to Participants.

On a Mac there's nothing to install. The same steps are in Audio MIDI Setup → Window → Show MIDI Studio → Network.

Not in Directory? Give it a few seconds, then add it with the Directory's +: the board's IP address (hold K2) and port 5004.

The rtpMIDI window: My Sessions is empty with a + button under it, and Directory lists patternflow.
My Sessions

Press +. patternflow is already listed in Directory.

Stuck here? Tell us

Ableton Live

Tick Remote, then map.

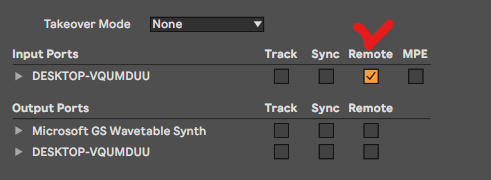
In Live, open Settings → Link, Tempo & MIDI. Under Input Ports, tick Remote on the row named after your computer: that's the session.

Press Ctrl-M (Cmd-M on a Mac), click any knob or slider in Live, turn a knob on the board, press Ctrl-M again. That knob now moves it, both ways, and stops at the ends.

Takeover Mode, on the same Settings page, decides how a control picks up after a knob has hit an end. Value Scaling is the smooth one.

Connected in rtpMIDI, but nothing moves in Live? Remote isn't ticked.

The MIDI ports in Live's Link, Tempo & MIDI settings: under Input Ports, the row named after the computer has its Remote box ticked; Track, Sync and MPE are empty.

Input Ports · RemoteTicked on the row named after your computer, in Live's Link, Tempo & MIDI settings.

Stuck here? Tell us

The map

Channel 1, and the numbers each way.

Everything is on channel 1. It's fixed in the firmware, so that's the channel to set in your DAW.

Out of the board: K1 to K4 send CC 24 to 27 as a hand turns them. Their buttons send notes 60 to 63. A change of pattern sends a Program Change.

Into the board: CC 20 to 23 set knobs 1 to 4, each until a hand turns that knob. Notes 60 to 63 press the buttons. A Program Change picks a pattern.

In Live: to get the buttons' notes on a track, tick Track on the session's row under Input Ports. To send to the board, tick Track on its row under Output Ports and set a MIDI track's MIDI To to the session.

Stuck here? Tell us

Settings

The console's MIDI page.

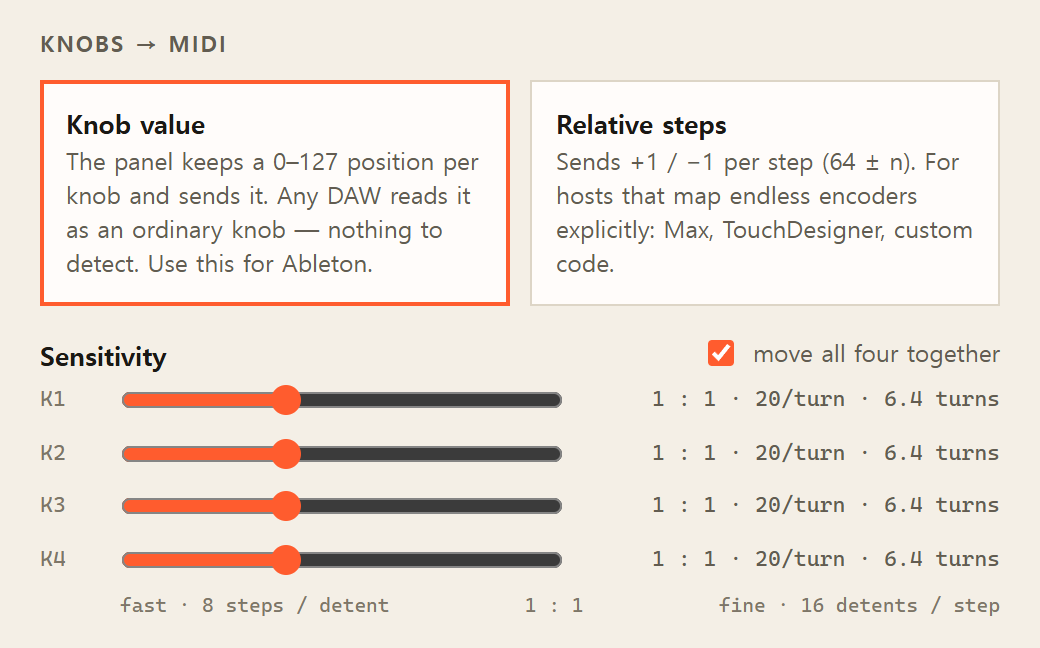
Open the console (patternflow.local, or the IP address from hold K2) and go to MIDI. Sensitivity sets how far a turn goes, from ×8 to 1/16. The four sliders move together; untick “move all four together” to set one knob alone.

Knob value sends a position from 0 to 127 and is the one to use with Live. Relative steps is for software that maps endless encoders itself, like Max or TouchDesigner.

Under Switch, MIDI on this panel turns MIDI off without reflashing.

The Knobs → MIDI section of the console's MIDI page: Knob value is selected beside Relative steps, and under them Sensitivity has a slider each for K1 to K4, all at 1 : 1, with move all four together ticked.

Knobs → MIDIThe value mode on top, Sensitivity under it.

Stuck here? Tell us

Stay connected

Use this computer.

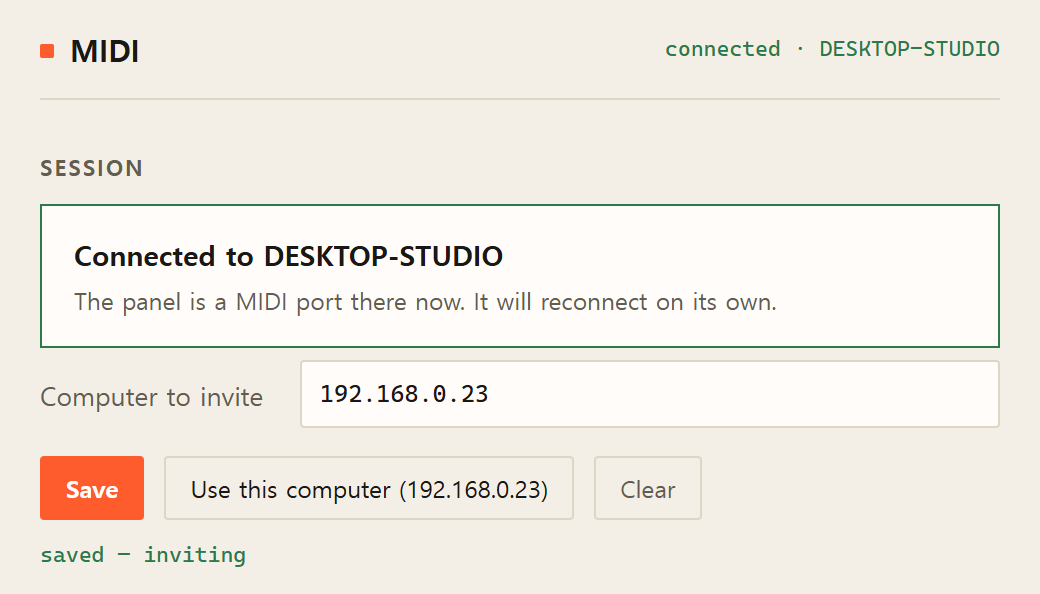
On the console's MIDI page, under Session, press Use this computer. The board remembers this computer's address and opens the session itself, on every start and whenever it drops. rtpMIDI never needs opening again.

It waits 20 seconds before it calls, so a fresh start takes a moment. In rtpMIDI, leave Who may connect to me at Anyone: that's what lets the board call your computer.

The Session section of the console's MIDI page: Connected to a computer, an address in the Computer to invite field, the buttons Save, Use this computer and Clear, and under them the words saved — inviting.

Use this computerPressed: this computer's address is in Computer to invite, and the page says saved — inviting.

Stuck here? Tell us